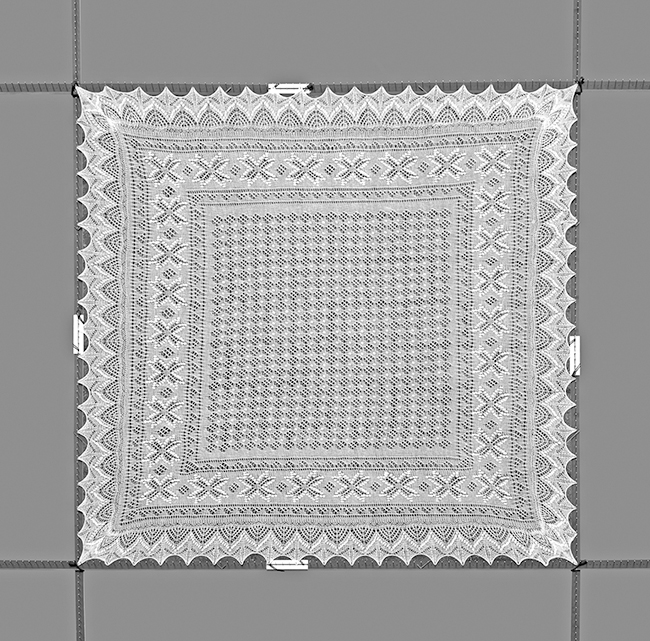
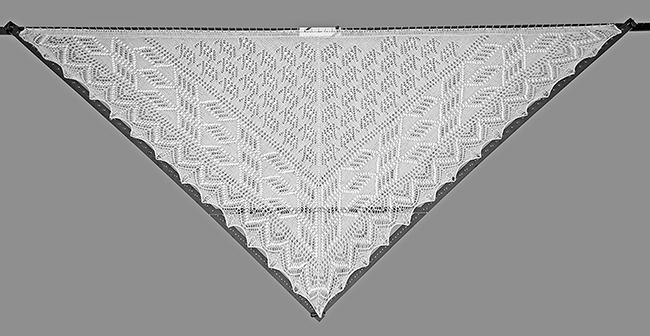
Blocking frame for Haapsalu lace shawls
The blocking frame has been developed according to the specifications of experienced Haapsalu lace knitters in Sujur’s workshop, situated in Matsuri village, Setomaa, south-east Estonia. The frame has strong yet fine metal pins that will not stretch the holes in the lace too wide. The blocking frame is extendable, making it possible to block very large pieces.
The set includes:
• 4 bars with stainless steel pins (2 mm in diameter and 2 cm apart)
• 4 bars with pins and holes
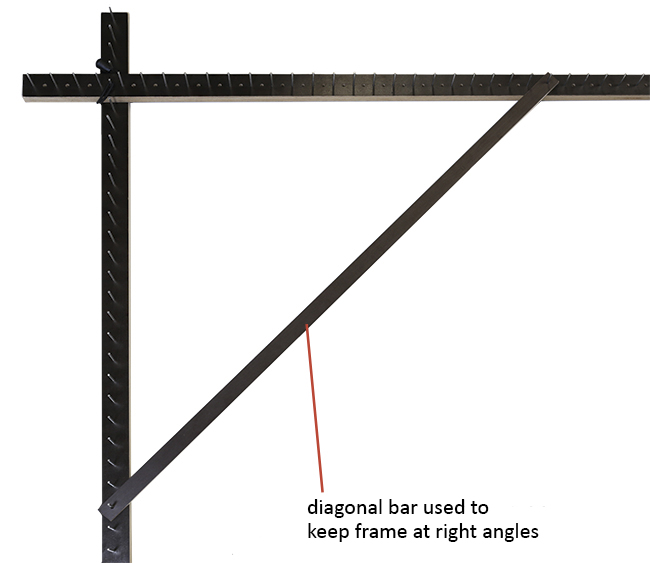
• 4 diagonal bars to secure the corners
• 4 pieces of clear acrylic to extend the bars
• 4 metal cuffs to stabilise the joints
• 8 rubber bands to secure the joints
• a sturdy veneer storage box with a clear lid
Assembling the frame
1. Establish whether you need to extend the bars.
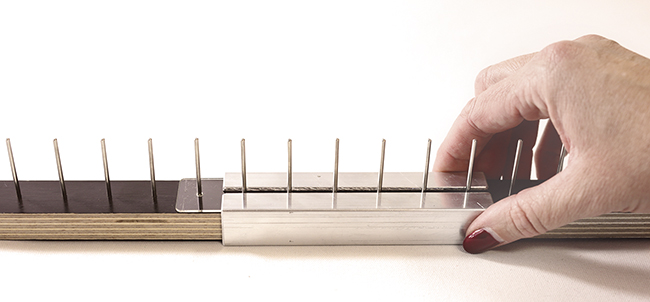
2. To extend the bars, place two bars end to end and place a piece of the clear acrylic over the pins at the joint.
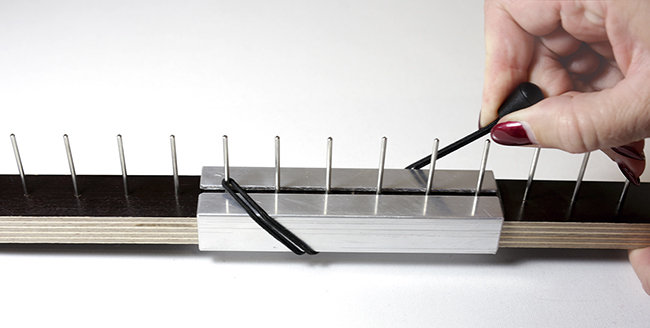
3. Now slip the metal cuff over the joint.
4. Secure the joint with a rubber band as shown in the photo.
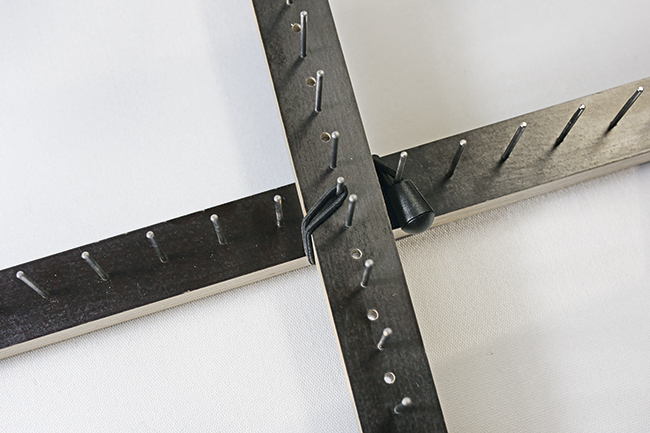
5. At the corners, place the bar with holes and pins over the bar with one of the pins going through a hole. Secure the corner with a rubber band.
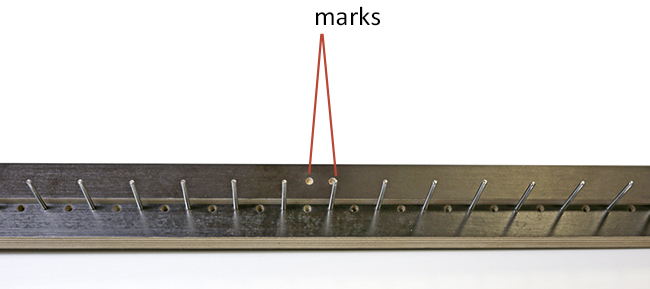
6. Keep the blocking frame from skewing by attaching diagonal bars at the corners. Two marks have been drilled into the bars to help find the correct pins to attach the diagonal bars to.
To find the right pin, place the diagonal bar parallel to one of the pin bars with the hole at the end level with the pin attaching the two bars. One of the marks will be placed above the pin at which one of the ends of the diagonal bar should be attached. Similarly, find the pin to attach the other end of the diagonal bar to.
Blocking
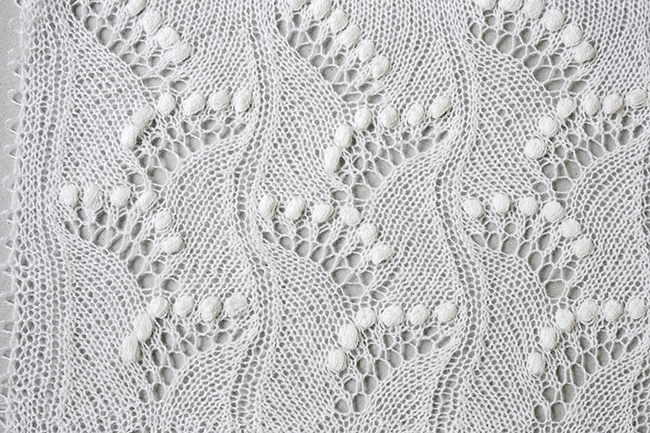
Haapsalu lace shows its true beauty only after blocking.
The finished shawl is hand washed in lukewarm water using wool detergent. Do not wring it out! The shawl needs to be blocked after each wash.
How to block a rectangular shawl
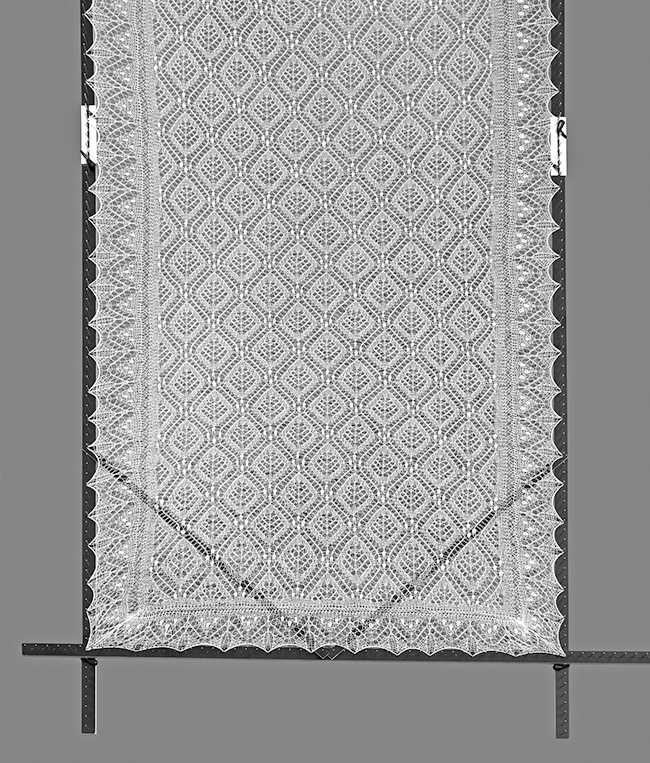
The frame is only partially assembled before blocking, because the width of the shawl becomes clear when blocking.
Start by joining one extended bar (photos 1-4) without holes and one bar with holes (photo 5).
- Start blocking the shawl from a corner at one of the ends.
- Spread the scallops of the lace edge on the pins without overly distorting the centre lace section of the shawl. Find a suitable distance between the scallops (for example every 2 or 3 pins) or a rhythmic pattern (for example once every 2 pins, then once every 3 pins).
- This determines the suitable width of the frame.
The other sidebar of the frame can now be attached.
- Tension the sides of the shawl to the frame, while alternating between sides. Find a suitable distance between the scallops (for example every 2 or 3 pins) or a rhythmic pattern (for example once every 2 pins, then once every 3 pins).
- If the scallops do not match the pins, a stainless steel blocking wire can be used. Thread the wire through the scallop and place the wire behind the row of pins. The scallop can then be adjusted as needed.
- Ensure that the centres of the sides are aligned.
The other end bar can now be attached after the sides of the shawl have been tensioned.
- Count the number of pins at the top end and make sure to match the number at the bottom end.
- Tension this end in the same manner as the first end.
- Ensure that the centres of the shawls are aligned.
Secure the frame with diagonal bars (see step 6). The diagonal bars can also be placed on top of the shawl.
Dry the shawl on the frame.
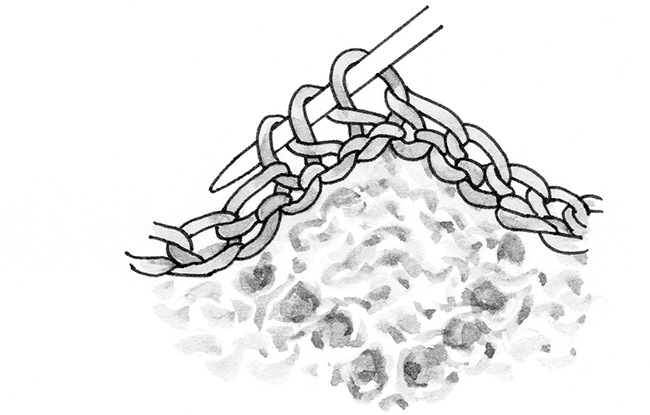
After blocking, the cast-on edge is picked up using a knitting needle and slightly stretched. The scallops are further manipulated, stretching each side individually. This gives the scallops a nice uniform shape.
Picking up and stretching the cast-on edge.
How to block a square shawl
Square shawls are blocked in the same manner as rectangular shawls. The only difference being that all of the side bars need to be extended.
How to block a triangular shawl
Join two bars, both of which have pins and holes (photo 5). The bars need to be extended if the shawl is very large. Start blocking the shawl from the bottom scallop. Place the bottom scallop over the pin at the joint.
- Tension the sides of the shawl to the frame while alternating between sides. Find a suitable distance between the scallops (for example every 2 or 3 pins) or a rhythmic pattern (for example once every 2 pins, then once every 3 pins).
- Ensure that the sides match.
- The top bar can be attached after the sides have been tensioned. Join two bars together to accomplish this.
- If there is no lace edging at the top edge, thread a strong piece of waste yarn through the edge stitches. Tension the yarn and place it behind the pins. This makes a straight edge without unwanted scallops.
- If there is a lace edging at the top edge, tension the scallops over the pins leaving a suitable distance between the scallops.
- In each case, ensure that the centre of the top edge is aligned with the point of the shawl.
After blocking, the cast-on edge is picked up using a knitting needle and slightly stretched. The scallops are further manipulated, stretching each side individually. This gives the scallops a nice uniform shape.

